
Overview
A verification result is the record of a single identity check run through Verify. It tells you whether the person passed, which documents and checks were involved, and whether anything needs a closer look before you act on it.
You can review a result two ways. The first is as you go, while you're running the verification itself. The second is afterwards, by looking it up in the Verifications list. That second route is handy when you need to revisit a recent check, look into one that didn't pass, or pull records together for a compliance review.
This guide focuses on the second route: finding a past verification, reading the result, and digging into its history.
Find a verification
All of your verifications live in one place, so you can search and filter your way to the exact one you're after.
- Click Verifications in the secondary navigation menu to open the full list of verifications.
- Use the filters along the top of the list to narrow things down.
- Click Filter to apply your selection. The list updates to show only the verifications that match.
Here's what each filter does:
- Search bar — a free text search. Look up a verification by member number, name, or ID.
- All statuses — filter by outcome: Passed, Failed, Error, In Progress, Expired, or Approval Required.
- All policies — narrow the list to a specific configured policy.
- All systems — filter by the channels and apps you've deployed Verify into.
- Date range — limit results to a time window, such as the last 7 days.
Tip
You can stack filters to zero in quickly. Pairing a status like Failed with a date range, for example, surfaces just the checks that didn't go through in the period you care about.
Open a verification
Opening a single verification gives you everything recorded about that check, split across two tabs: Overview and History.
- In the Verifications list, click the Request Id link for the verification you want to review.
- The verification opens on the Overview tab. You'll find the Overview and History tabs in the dark blue bar near the top, just below the verification name.
- Click Overview for the headline result, or History for the full event log. You can switch between the two as often as you like.
The Overview tab
The Overview tab opens by default and gives you the result at a glance, broken into two panels.
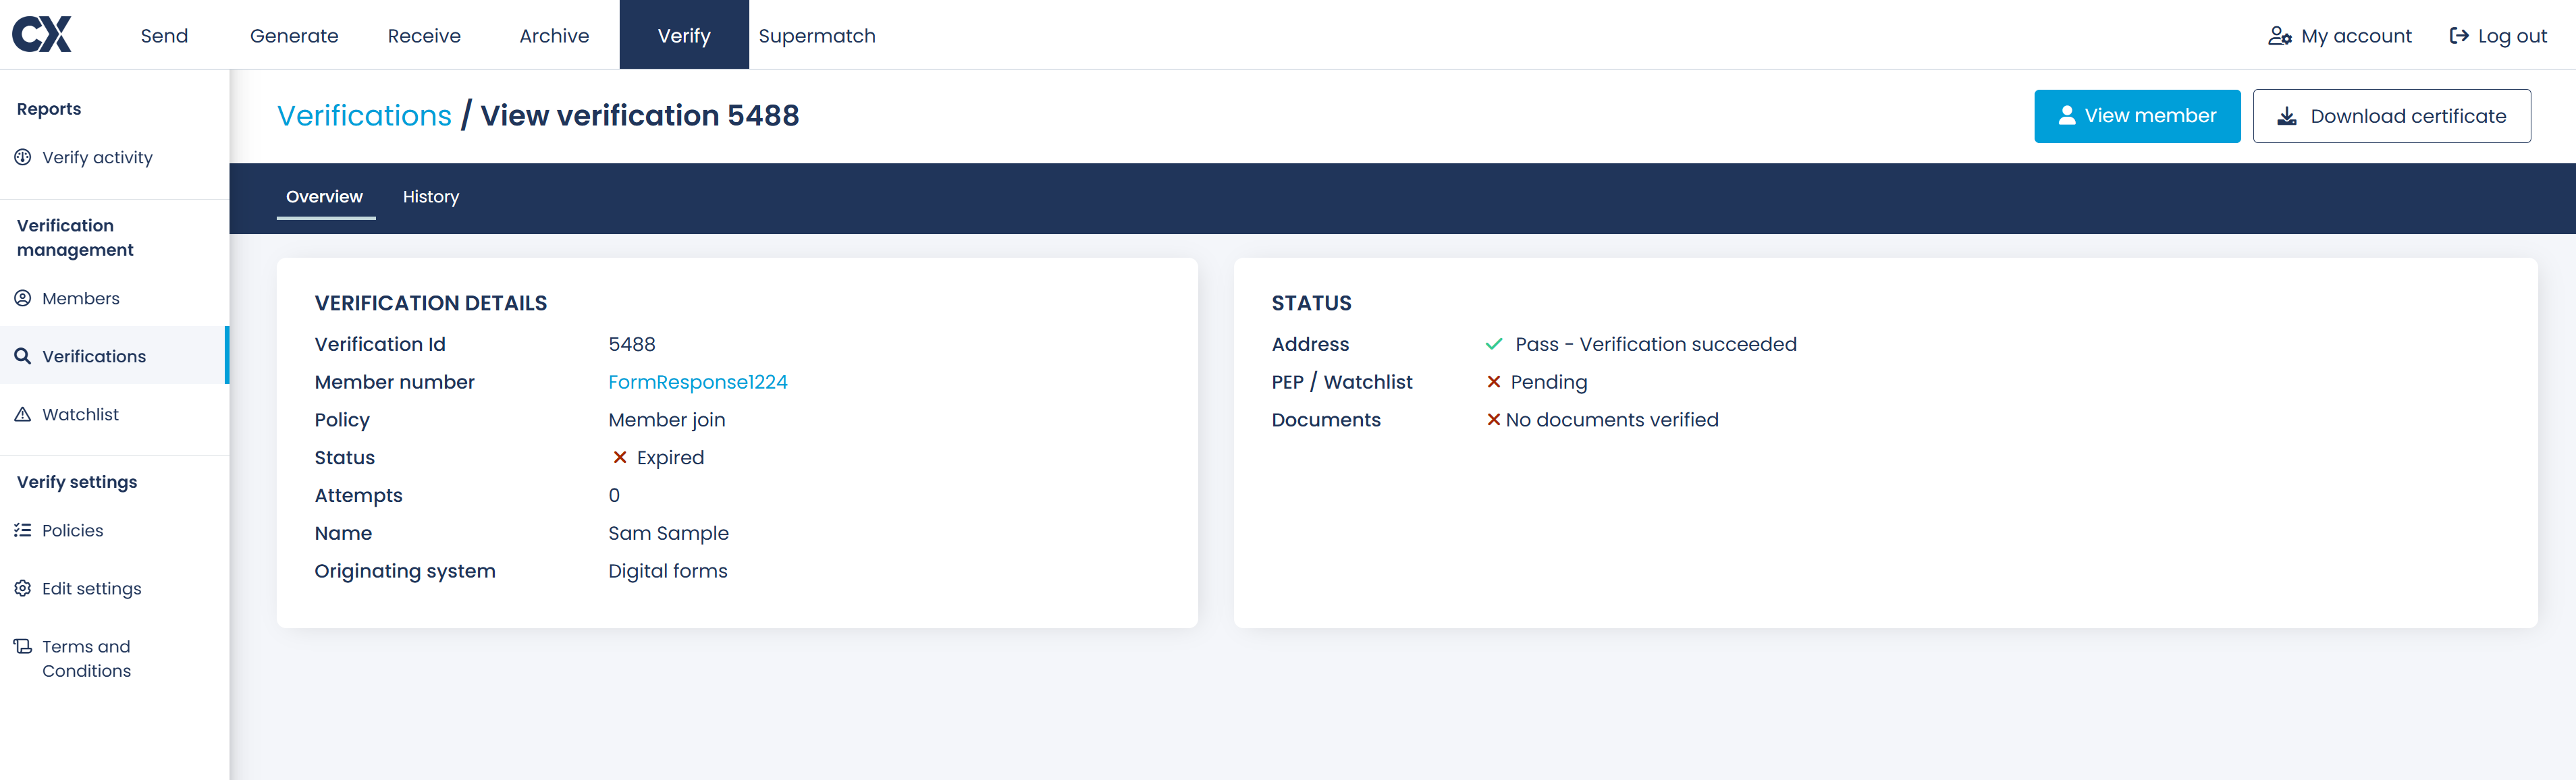
The Verification details panel covers the key facts about the check: the Verification Id, Member number, the Policy applied, the overall Status, the number of Attempts, the member's Name, and the Originating system the verification came from.
The Status panel breaks the outcome down by check:
- Address — whether an address check was required, and if so, whether it succeeded.
- PEP / Watchlist — the status of the politically exposed person (PEP) and Watchlist checks, based on the policy applied.
- Documents — whether any identity documents were verified. Where documents were submitted, you'll also see their type, status, and the number of attempts made against each one.
The History tab
The History tab is the complete record of how a verification played out. Click History at the top of the verification to open it.
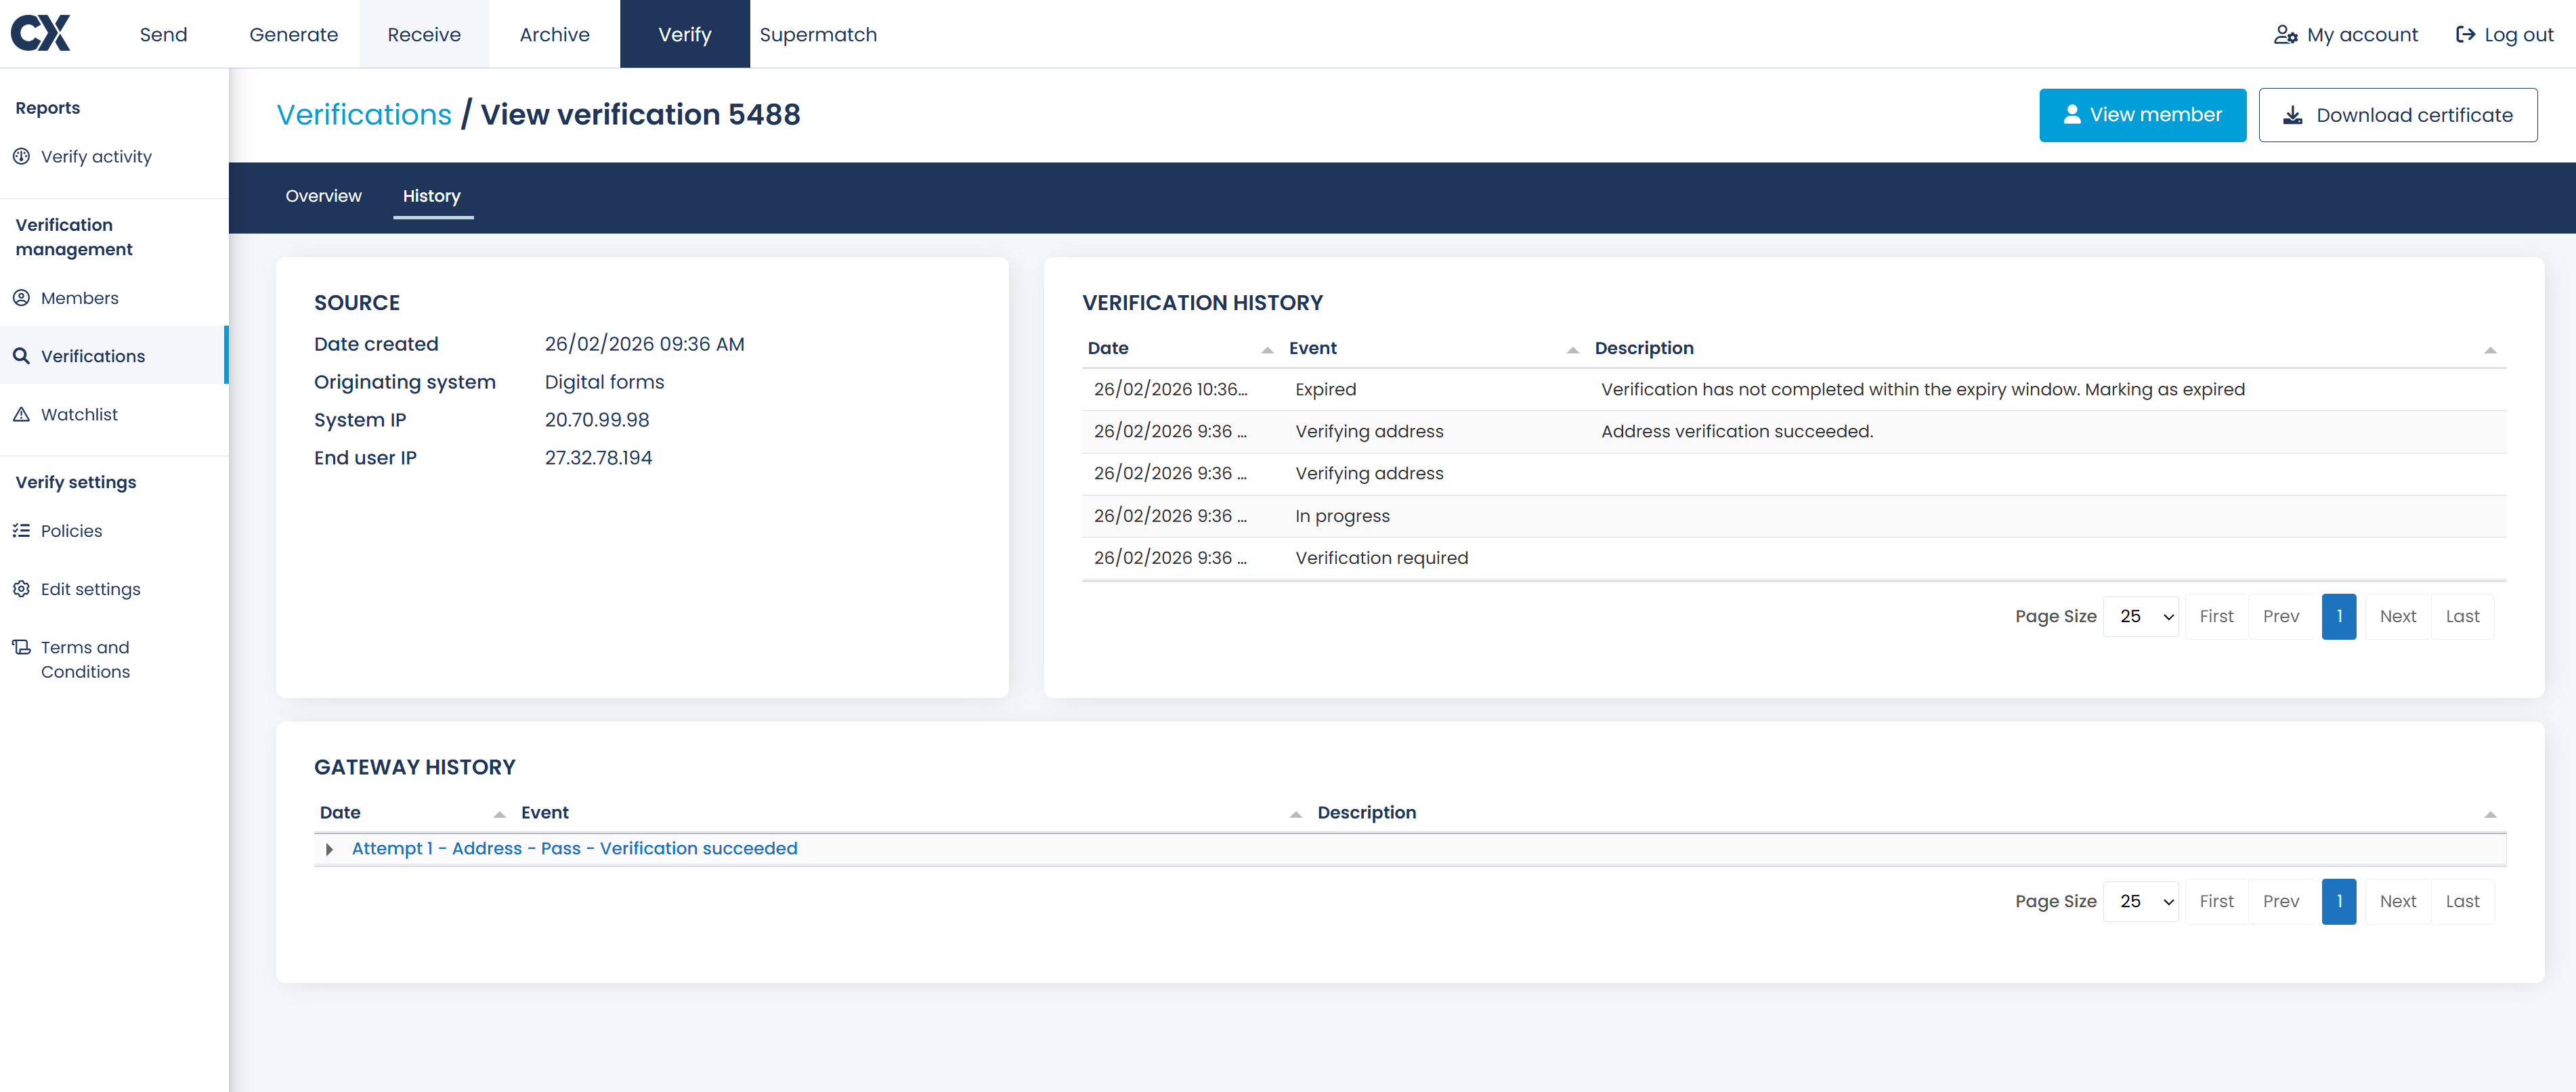
It's split into three views, each adding a layer of detail:
- Source — where the verification came from. This covers the date it was created, the originating system, and the system and end-user IP addresses. Where a staff member ran the verification, you'll also see the user recorded here.
- Verification history — a dated, step-by-step log of events as the verification progressed, each with a short description. You'll see entries like the check being required, moving into progress, an address being verified, and the final outcome, such as a verification that wasn't completed in time and was marked expired.
- Gateway history — a deeper log of each attempt made against the Document Verification Service (DVS), including the document or data checked and the outcome of every attempt. Click an attempt to expand it and see the detail.
Finding the DVS transaction ID
Gateway history is also where you'll find the unique DVS transaction ID for each attempt. It's your confirmation that an identity document was submitted to the DVS for validation, which makes it valuable for auditing and as proof of your Know Your Customer (KYC) checks.
Between the two tabs you've got the full picture of any verification, from the headline result right down to each individual attempt. If you ever need to confirm exactly what happened and when, the History tab is your complete audit trail.